Showing posts with label Recipes by Ryann. Show all posts

Friday, September 26, 2014

Simple Slow Cooker Chicken Salsa Soup

Possibly the easiest and tastiest soup you'll ever make! 

Okay you guys, this may well be the easiest—and one of the tastiest—dishes I've come up with in a loooooong time. Just six ingredients that you probably already have on hand and a crock pot. It really couldn't be simpler.

I was running short on time and inspiration yesterday and I needed a fast meal that I didn't have to do much (read: any) prep for. My friend Kristen shared this yummy recipe for a five-ingredient white chili on Facebook, but I didn't have the right beans and the crushed tomatoes were calling my name. Plus, let’s face it, any meal that can be cooked in a crock pot in my house will be.

So I went the pantry (a.k.a a plastic shelf in my garage), pulled out the ingredients, tossed them in the slow cooker, and walked away. Here’s what went into the pot:

Simple Slow Cooker Chicken Salsa Soup

Serves 6-8

Ingredients

2 (15-ounce) cans of chickpeas, drained and rinsed
4-6 boneless, skinless chicken thighs
1 (12-ounce) jar salsa verde (green salsa)
1 (28-ounce can) crushed tomatoes in juice
2 cups low-sodium chicken broth or stock
1 tablespoon ground cumin

Directions
Place all ingredients in crock pot and cook on high for 4-6 hours or low for 8-10 hours. Easy peasy.

Results
I already told you that this soup turned out tasty. But it’s a true testament to yumminess when I’m eating leftover piping hot soup…at 10 AM…when it’s already in the mid-80s outside…and the AC is blasting. Southern California has not gotten the memo that it’s supposed to be FALL and it’s killing me. I think I’ll go light my pumpkin spice candle in protest.

Seriously though, the hubs gave this one the thumbs up and I’m eating it for breakfast, so yeah, rave reviews all around. It’s clean too, so totally AdvoCare approved. Woot Woot! Double bonus.

You could garnish this soup with all sorts of stuff like cilantro, green onions, lime wedges, and—if you're being indulgent—cheese and tortilla chips, but I promise you, it’s delicious as is. Enjoy!

Until next time,
Ryann

Thursday, February 27, 2014

Clean Quinoa and Berry Breakfast Bake & AdvoCare Update

A Berry-Licious Healthy Breakfast Option
If you're eating clean and tired of scrambled eggs or oatmeal for breakfast, I have the perfect recipe for you: this delicious berry and quinoa breakfast bake. It’s AdvoCare friendly (for both the Cleanse and Max Phase) and my kids and hubby loved it too, win-win!!!

I know I've been talking about AdvoCare a lot lately—but I can't help it. I love the products and the program and it’s been so exciting for me personally to see the positive changes AdvoCare has made to my body and my life. And even BETTER, I've seen how much happier and healthier it’s made several people that are near and dear to me.

I don't just talk the talk, either. I’m a firm believer in practicing what you preach. I just wrapped up my second 10-Day Cleanse mid-February to get rid of that last bit of holiday “fluff.” Here’s my before/after pic. Not too shabby for 10 days, right? Total belly buster! (To learn more, visit www.Advo949.com or email me any time at Advo949@gmail.com.)

10-Day Cleanse complete! I'm 4 pounds lighter, 2.5 inches smaller, and leaner with less mid-section "fluff." I'll take it!

Now, on to that yummy recipe!!!

Clean Quinoa and Berry Breakfast Bake
Serves 12

Ingredients:
2 cups dry quinoa
4 cups water
Coconut oil or extra-virgin olive oil spray (I used coconut)
½ cup egg whites
1½  cup unsweetened coconut milk
1 teaspoon vanilla extract (alcohol-free preferred)
1 teaspoon cinnamon
2 packets of stevia powder (about ½ teaspoon)
1½  cup blueberries, washed any stems removed
1½ cup strawberries, washed, stems removed, cut into small chunks

Directions:
Rinse quinoa in cold water, unless already pre-rinsed. (A mesh strainer works well for this step.)

Place rinsed quinoa and water in a medium-to-large pot with a lid. Bring to a boil. Reduce to simmer, cover, and cook until all the water is absorbed, about 12-15 minutes. You’ll know it’s done when it becomes soft and translucent and the germ ring becomes visible along the outside edge. Set aside.

Preheat oven to 375 degrees.

Spray a 13x9-inch baking dish (I used glass) with coconut oil spray or olive oil spray. (Coconut oil will taste better with this recipe.)

In a large bowl combine, egg whites, coconut milk, vanilla extract, cinnamon, and stevia. Stir well.

Add berries, mashing them a little as you stir.

Fold cooked quinoa into the berry mixture and stir until evenly distributed.

Pour quinoa/berry mixture into baking dish and use a spatula or large spoon to make sure it is evenly distributed in the dish. Sprinkle with additional cinnamon, if desired.

Bake for 25-30 minutes at 375 degrees until the edges begin to brown and the eggs whites set.


Spoon onto plates or into bowls and sprinkle with a little extra cinnamon and stevia powder just prior to serving. 


Fresh out of the oven. Yum!!!

Results:
I’m not gonna lie…this smells too good to be good for you
—especially while it's cooking in the oven. The scent is like cinnamon-berry cobbler or pie—or both—mooshed together. Divine!

There’s a lot of wiggle room with the different ingredients you could try in place of the berries here (I’m thinking my next test will be a peanut butter/banana/cinnamon version).

But if you want a berry-licious, healthy, protein-packed breakfast—that isn't plain eggs—this will hit the spot. It makes a great afternoon snack or good-for-you dessert, too. 

Let me know what you think, and if you come up with variations of your own, I'd love to hear about them. 

Until next time,
Ryann

P.S. If you've been on the fence about giving the 24-Day Challenge a try, now is a fantastic time. The 24-Day Challenge Bundle is now customizable so you can choose energy drink and shake flavors and pick which vitamins are right for you (which is really exciting)! Just email me at Advo949@gmail.com and I can share my favorites and help walk you through choosing which products best suit your needs. 

Tuesday, February 11, 2014

Chicken Sausage Jambalaya

Hearty, Delicious, and Healthy!

If there are any die-hard traditional jambalaya fans out there, I apologize in advance: This recipe might disappoint you. This version only contains clean chicken sausage (I don’t care for shrimp and didn’t have chicken on hand when I made it), I used brown rice instead of white to make it acceptable for those doing the 24-Day Challenge, and I threw it all in the Crock Pot, which goes against the preparation methods of true jambalaya.

But, if you are looking for a savory, slightly spicy, good-for-you meal that will stick to your ribs but not your waistline, you’ve come to the right place.

When you shop for clean sausages, look for those with no additives, fillers, preservatives, etc. I like to take the casings off before I slice mine. It makes them even healthier, however, it’s not a necessary step.

I used the Crock Pot (surprise, surprise!) for this dish but a Dutch oven or stockpot would work equally well. Here’s what I came up with:

Chicken Sausage Jambalaya
Serves 6

Ingredients:
3 cups chicken stock or broth (organic preferred)
1 (28-ounce) can diced tomatoes with juice
1 (4-ounce) can diced green chile
1 (15-ounce) can white beans, drained & rinsed
4 chicken sausages, sliced (I used the spicy Italian ones from Trader Joe’s and removed the pork casing)
1 cup brown rice (I used the frozen, already cooked version from Trader Joe’s)
1 bell pepper, chopped (I used yellow but have used orange in the past too)
1 cup celery, chopped (approximately 4 large celery stalks)
1 small red onion, chopped
1-2 teaspoons Old Bay Seasoning (for a lower sodium version, use Cajun seasoning just omit the salt)

Directions:
Toss all ingredients in the Crock Pot (or Dutch oven or stock pot) and cook on HIGH for a MINIMUM of two hours. Soups always taste better the longer they simmer but since the chicken sausages I used were pre-cooked, I was really just waiting for the veggies to soften and the flavors to mingle.

Results:

I’ve made this several times in the past few months because it’s such a tasty and easy go-to meal. The hubs is obsessed with Old Bay seasoning (he went to high school and college in Maryland—Go RAVENS!!!) so I’m pretty liberal with this seasoning in this particular recipe. As noted above, if you want a lower sodium alternative, make your own Cajun seasoning and leave out the salt.

I had it for lunch the day after I made it and I’m not gonna lie—it’s even tastier as leftovers. This dish is definitely in our regular rotation and I hope you enjoy it as well.

Until next time,
Ryann

P.S. For more information about AdvoCare and the 24-Day Challenge, email me at Advo949@gmail.com or visit www.Advo949.com.

Saturday, February 1, 2014

Crock Pot Chicken & Chickpea Clean Green Stew

Hearty, Healthy, Green and CLEAN!!!

A lot of my AdvoCare friends have either just finished or are getting ready to start their 24-Day Challenges so I wanted to get another yummy (and easy!) clean Crock Pot recipe out there. I’m starting my second 10-Day Cleanse on February 3rd so I’ve spent a lot of time this week planning out some really healthy meals that are so tasty that it’s hard to believe they are actually good for you. Which brings me to today’s steamy bowlful of deliciousness.

There is simply nothing better than a hot and hearty soup or stew when it’s cold outside. It actually rained here yesterday, so having food that warms you from the inside out was an extra bonus. (Yes, I realize that in Southern California what we call “rain” equates to “a light sprinkle” pretty much everywhere else in the country, but hey, it’s all relative, right?)

My friend Whittney sent me a picture of the white chicken chili she was making for dinner the other night and that got my wheels spinning. I went to the cupboard and fridge, pulled out everything I had that was green, and came up with this recipe. I usually make these types of dishes with black, kidney, white, or pinto beans, but I had several cans of chickpeas (aka garbanzo beans) on hand, PLUS the label was green so it fit in with the color scheme. I’m weird like that.  If you’d prefer to use white beans instead, please feel free.
Look at all that yummy green goodness!!!

Crock Pot Chicken & Chickpea Clean Green Stew 
Serves 6

Ingredients:

Olive oil spray
1 small onion, coarsely chopped (I used ½ white and ½ red because that’s what I had in the fridge)
4-6 boneless, skinless chicken thighs or two breasts, aim for about a pound (organic preferred)
2 (15-ounce) cans chickpeas (garbanzo beans), drained and rinsed
1 (12-ounce) jar green salsa (look for a “clean” brand without sugar, preservatives, etc.)
1 (4-ounce) can diced green chile
3-4 cups chicken broth or stock (organic preferred, use less for a thicker consistency)
1 teaspoon cumin
½ teaspoon ground coriander
1 avocado, cubed (garnish)
Cilantro (garnish)
Green onion (garnish)
Lime wedges (garnish)

Directions:

Lightly spritz the inside of the Crock Pot with olive oil spray. This step is not necessary, I just find that it makes clean up a little easier.

Place chopped onions in Crock Pot. Place chicken on top of onions. Add garbanzo beans, salsa, diced chile, chicken stock, and spices. Cover and cook on low for 8-10 hours or on high for 4-6 hours.

Just prior to serving, ladle out about a cup of the stew containing the chickpeas/chicken/onion mixture. Using a blender, food processor, or hand mixer, pulse until smooth. Add pureed mixture back into the crock pot and stir. NOTE: This step is completely optional. I wanted a little creamier texture. Omitting the blending step will result in a more broth-y soup and I was going more for stew.

Ladle chili into serving bowls. Garnish with avocado cubes, cilantro, green onion, and lime wedges and serve immediately.

Results:
If you have the time, cook this on low ALL DAY LONG. Your house will smell AHHHH-mazing and the longer you let this simmer, the better it tastes!

And speaking of taste---OMY!!! You read that right…oh my YUMMY! So flavorful! The hubs and I gobbled this up went back for seconds. I’m pretty excited about the leftovers for lunch today, too.

Could you do this on the stove? Absolutely. But the beauty of the Crock Pot is that you literally throw all the ingredients in and walk away. No fuss, no muss! If you don’t have a Crock Pot, go out and get one—immediately. They are pretty inexpensive at places like Wal-Mart, Big Lots, Target, etc. and they will save you tons of time and provide lots of leftovers.

Until next time,
Ryann

P.S. For more information on AdvoCare, the 24 Day Challenge, or the 10-Day Cleanse, check out www.Advo949.com. A HUGE group of people just finished the challenge and another large group is getting ready to kick off their challenge the day after the Super Bowl. Pictures speak louder than words. Check out these impressive before/after images. (That’s me in the purple tank top with the peacock feather in the background!) If you have any questions, feel free comment below or email me at Advo949@gmail.com. 

Monday, January 20, 2014

Clean Crock Pot Chicken and Lentil Curry

Who knew eating clean could taste SOOOO good?!?
I know, I know. It’s been SIX months since my last post. In my defense, I've been a pretty busy girl. I started working again part time, started running A LOT and training for my second half marathon, and started attending an EARLY—5:30 AM early—morning boot camp 2-3 times a week to build a little muscle and tone up after my 22-pound weight loss last year. (More on that here.)

One of my New Year’s Resolutions was to “Eat clean in 2014.” And though we’re only three weeks in, so far I’m doing awesome. If you would have told me six months ago that meals made without cheese, processed carbs, and fat could actually taste AMAZING, I would have laughed at you. But it’s true…and I can honestly say, my view on eating has changed considerably. I also have the hubby on board with the new philosophy, which is always helpful.

Recipes by Ryann
is about to take a turn for the healthier. Most of the recipes I've posted in the past qualify as “good for you.” But I want to take clean eating to a new—and even tastier—level. I want to share meals that will fill you up—not out—and delight your taste buds at the same time. Healthy, clean, and delicious…that’s the new motto. I also want to make sure that everything I post is acceptable for those participating in the AdvoCare 24-Day Challenge or 10-Day Cleanse. (I’m happy to share info about the AdvoCare programs/products with anyone who is interested. Just visit Advo949.com or email me at Advo949@gmail.com.)


But I digress. One of my favorite cuisines is Indian. I've found lots of different curries and simmer sauces at several local stores. Problem is, they are LOADED with excess salt, artificial colors and flavors, and sugar. The solution? Come up with my own from scratch using clean, healthy ingredients! I did some research, cobbled a few different recipes together, and came up with this:

Clean Crock Pot Chicken and Lentil Curry

Serves 6

Ingredients:

Olive oil spray
½ onion, chopped (I used red)
1 small bell pepper, chopped (I used red)
1 large zucchini, chopped
4 garlic cloves, peeled and minced
1 cup uncooked lentil beans (I used red split lentils from Trader Joe’s)
2-3 boneless, skinless chicken breasts
1 28-ounce can diced tomatoes in juice (organic preferred)
3 cups chicken broth or stock (organic preferred)
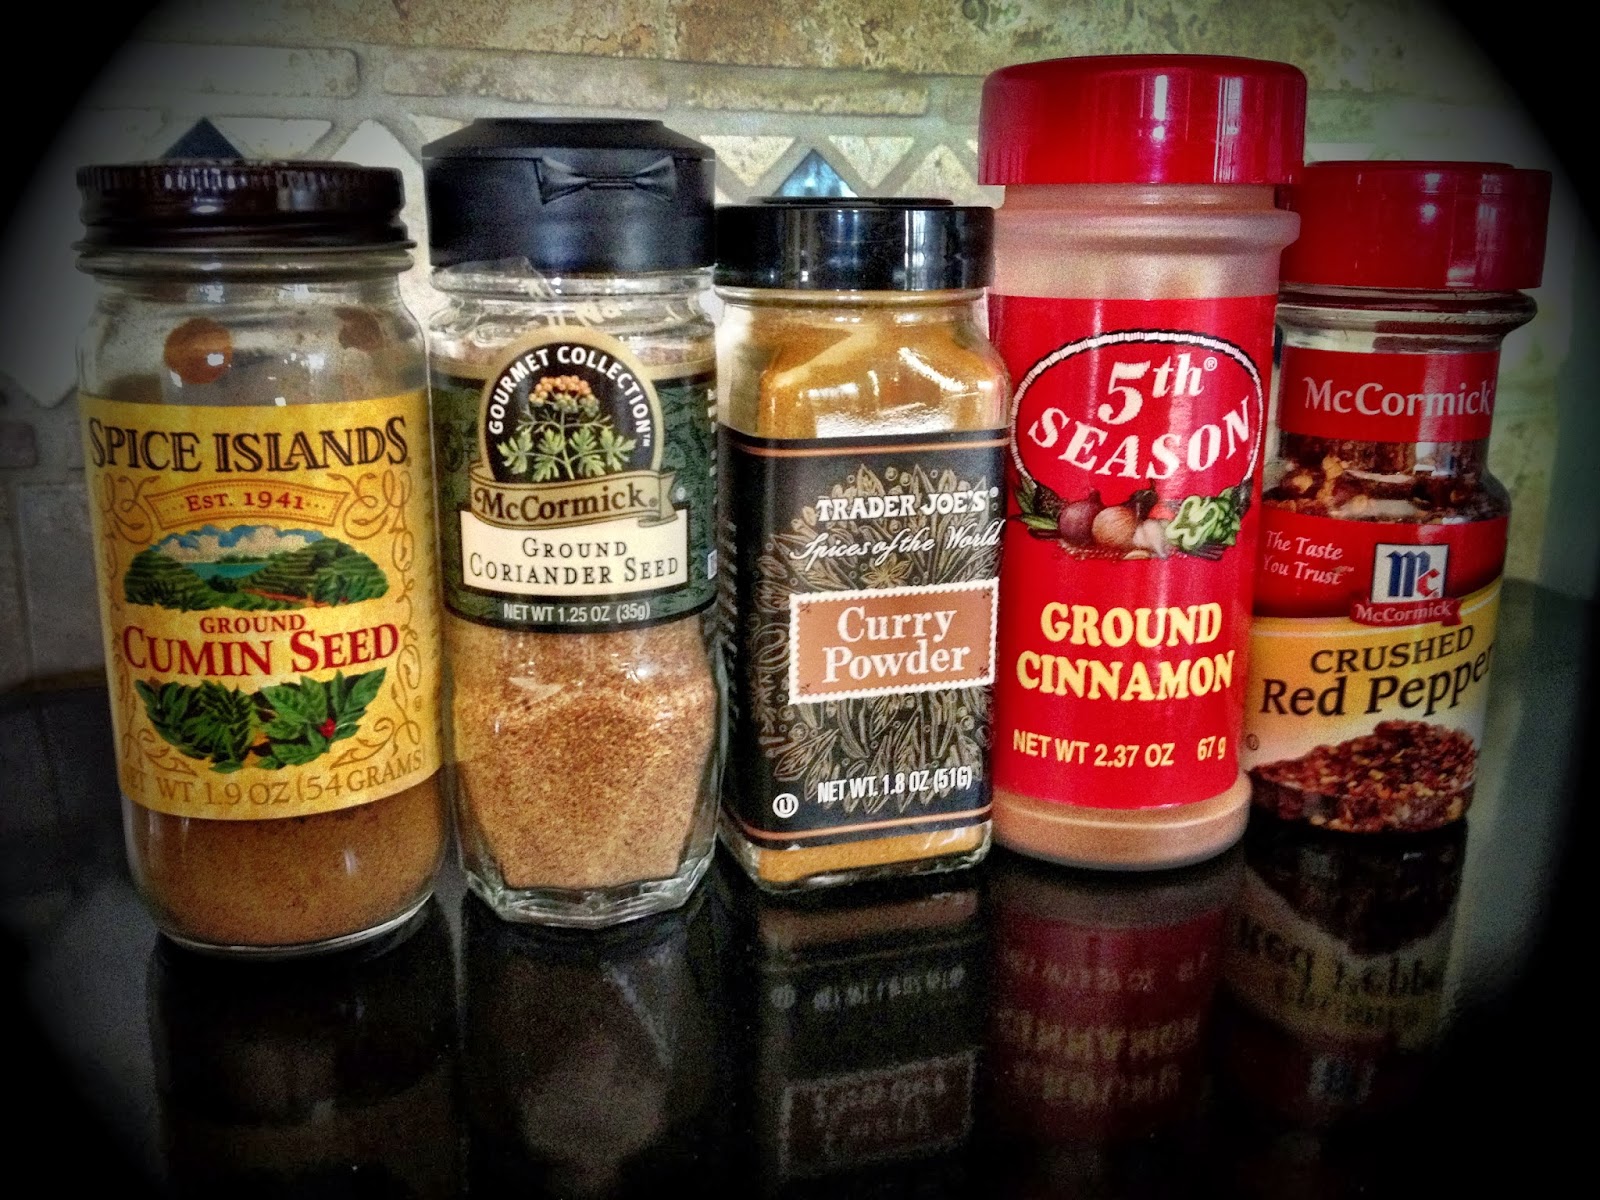
1 teaspoon ground cumin
1 teaspoon ground coriander
1 teaspoon curry powder
½ teaspoon cinnamon
¼ teaspoon red pepper flakes (careful, these are hot!)
Fresh cilantro (for garnish)
 

Directions:
Spritz the inside of the Crock Pot with olive oil spray. (This step isn't necessary, but it does make cleanup easier.)
Fresh veggies, ready for the Crock Pot!

Place veggies and minced garlic in the bottom of the Crock Pot.

Add lentils.

Place uncooked chicken breasts on top of veggies and lentils.

Pour canned tomatoes—with juice—over chicken breasts.

Add chicken stock (or broth) to Crock Pot.

Sprinkle seasonings over the top.
Spice is nice!

Cover and cook on “low” for 8-10 hours or on “high” for 4-6 hours.

About half an hour prior to serving, remove lid and shred chicken using two forks or tongs.

Garnish with fresh cilantro after curry is plated.

Results:
You guys…seriously….my house started smelling delicious after only an hour of cooking. I was short on time so I opted to cook it on high for about 5 hours. The “fast cook” works great, but for stews, soups, chili, and other similar dishes, I’m also a big fan of simmering on low all day so the flavors can really mingle and the consistency becomes a little thicker.

The “not-so-secret ingredient” cinnamon, lends a little sweet spice to an already delectable and hearty curry. I served this as more of a soup but it would also be great ladled over brown rice (or quinoa for a protein-packed alternative). If low-carb is your goal, spooning it over leafy greens as a salad topping or using it to stuff lettuce leaves would also be an option.

I like my curry SPICY so I did add a tiny dash of hot sauce. Sprinkling in a few additional red pepper flakes—either in the Crock Pot prior to cooking or as a garnish afterward—would also dial the heat factor up a notch.

The hubs and I both gobbled this up. And okay, I admit it, we both went back for seconds!

I hope you enjoy this curry as much as we did. It feels GREAT to be sharing recipes with you all again. I’ll be back soon with another healthy, tasty, and good-for-you dish. I promise!!!

Until next time,
Ryann


P.S. For more information on AdvoCare or the 24-Day Challenge, feel free to email me at Advo949@gmail.com or visit Advo949.com. 

Thursday, June 27, 2013

Low Carb Tomato Pesto "Pasta"


Guilt-Free, Low-Carb Deliciousness!!!
 
As you’ve probably noticed from my previous posts, I am a big fan of the tomato-basil combo. I mean really, these two yummy, fresh ingredients paired together…how can you possibly go wrong? Which is why when I first saw this recipe, I fell in love.
I adore pesto, and throwing tomatoes into the mix not only beefs up the health factor, it boosts the flavor as well. And any excuse to use my handy-dandy julienne peeler is a special added bonus.  
 

My favorite non-electrical kitchen gadget of all time.

I strayed a little from the original recipe. For starters, I used pine nuts instead of almonds. I also opted for real tomatoes rather than the canned variety. More basil and garlic are always better in my book, so I increased those amounts as well. Finally, I cut back on the olive oil, omitted the salt, and used veggies instead of pasta for the carb watchers out there. And thus, Low Carb Tomato Pesto "Pasta" was born. Here’s what I came up with.

Low Carb Tomato Pesto “Pasta”
Serves 2-3
Ingredients
3-4 zucchini squash
2-3 yellow squash
½ cup pine nuts
1 cup fresh basil
1½ cups cherry or grape tomatoes (or 1 large whole tomato)
1/3 cup shaved parmesan cheese
2 garlic cloves, peeled
2 tablespoons extra-virgin olive oil
Dash freshly ground black pepper
Water (if needed)
Olive oil spray


Directions
Use a julienne peeler or spiralizer to cut the zucchini and squash into thin, spaghetti noodle-like strips. (Here’s a quick YouTube video I found on how to use the peeler!)
Combine pine nuts, basil, tomatoes, parmesan cheese, garlic, and olive oil, and pepper into a food processor or blender and pulse until mostly smooth. Add a little water to thin if desired.

Spritz a medium-to-large skillet with olive oil spray and add “noodles.” Heat over medium-high heat until the vegetable strips become flexible, about 3-5 minutes.
Add tomato pesto sauce to the pan and stir well to combine. Continue cooking until heated through, about 5 minutes.

Remove from heat, plate, and garnish with a sprinkling of parmesan cheese, a few pine nuts, a dash of pepper, and a basil leaf, if desired.
Results
Ohhhhhh. Maaaaaaaa. Gawd!!! I seriously didn’t think vegetables could ever taste this good! If you want the indulgence of a delicious Italian dish—without any guilt—give this recipe a try.


I’ve made this three times now and it just gets better every time. I serve it with a little crusty fresh-baked bread with olive oil and balsamic vinegar dipping sauce (you know, to make up for the carbs I cut out by not using pasta) and it’s one of my favorite new meals.
You can also use the pesto on top of whole wheat pasta or as a dip. I’m pretty certain it would be amazing on top of a grilled chicken breast too.

I hope you enjoy this delicious recipe as much as my family and I do. It’s a keeper!
Until next time,
Ryann


P.S. I can hardly believe it but Recipes by Ryann turned one year old this month! WOOHOO!! I know I’ve been posting fewer recipes lately but life has been busy. I’m getting ready to start back at work part time but I will do my best to post healthy, delicious, family- and waistline-friendly recipes as often as I can. Thanks for reading and cooking with me. XO

Wednesday, May 29, 2013

Rosemary Dijon Chicken

Simple yet delicious. It doesn't get better than that.

A couple of my girlfriends and I were out having drinks a while back and we were chatting about recipes, feeding our families, etc. All of us share a love (okay, maybe obsession is a more appropriate term) of Pinterest, so it was no big surprise that we ended up talking about a pinned dish by the name of Holy Yum Chicken. My friend Amy said that even though her husband doesn’t like mustard, she’s made this twice and he’s devoured it each time. And my friend Lauren who hates yellow mustard was wary but a bit intrigued since this recipe calls for Dijon mustard rather than regular old French’s.
First of all, I LOVED the name. Holy Yum Chicken. How can you NOT make something with that title? I noticed straight away that this dish contains similar ingredients to one of my favorite go-to chicken dishes Unbelievably Simple Honey Mustard Chicken. (Remember that one? Just mustard, honey, and melted butter and it turns out AMAZEBALLS.) Well, think of Rosemary Dijon Chicken as the more sophisticated and über popular older sibling of the honey mustard chicken dish.

I stuck to the original recipe pretty closely but decided to use agave instead of maple syrup, omit the salt, and add a bit more rosemary. I didn’t have any fresh herbs on hand so I used dried rosemary but using the fresh stuff would probably make this dish even more incredible. I also used chicken breasts instead of thighs but I doubt it matters all that much. Finally, I didn’t really think the “sauce” needed thickening so I didn’t use any cornstarch. Here’s what I came up with.
Rosemary Dijon Chicken
Serves 2-3


Ingredients:

Olive oil spray
½ cup Dijon mustard
¼ cup agave nectar
1 tablespoon rice vinegar
¼ teaspoon freshly ground black pepper
4 teaspoons dried rosemary, divided use (use fresh if you have it)
2-3 boneless, skinless chicken breast fillets


Directions:
Preheat oven to 450 degrees.

Spritz a medium glass baking dish with olive oil spray.


In a small bowl, mix together mustard, agave, vinegar, black pepper and 3 teaspoons of rosemary. (Save 1 teaspoon of rosemary for garnish after cooking.)

Place chicken fillets in the glass pan and pour marinade over them, turning to make sure they are coated well.
Bake for 35-40 minutes or until internal temperature reaches 165 degrees.

Results:
If you couldn’t guess from the intro, this dish turned out awesome. Rosemary Dijon Chicken is easy to make, the flavors dance on your taste buds, and even though it’s simple, you’ll be able to fool others into thinking you slaved away in the kitchen for hours to make this deliciousness.
If you’re tired of boring old chicken, give this recipe a try. You won’t be sorry.

Until next time,
Ryann

Thursday, May 2, 2013

Rainbow Fire Slaw

Simple. Spicy. Scrumptious!
A few months ago, the hubs and I were watching Diners, Drive-Ins, and Dives on the Food Network. They were featuring food trucks around the country and one of them was serving these yummy crab cake burgers with something called Tiger Slaw. It was like coleslaw on steroids. It had all sorts of crazy-cool ingredients like daikon, grape seed oil, lemongrass stalks, and kaffir limes. It sounded delicious but let’s be serious—who has these ingredients on hand? (I just now had to Google “daikon” to figure out what it was! It’s a white radish…who knew?)

Anyhoo, I wanted to make an easier, more normal-person-friendly version that was inspired by some of the flavors in the original dish. (Think green apple, garlic, citrus, and a little heat.) Plus, making slaw allows me to use my new favorite kitchen gadget, my julienne peeler. If you don’t have one, go out and buy one immediately. I got mine from Home Goods in a pack with two other peelers for $6 bucks and it’s the best investment I’ve made in a LONG time.
Now if you are expecting traditional coleslaw, just walk away now. Mayonnaise is my least favorite condiment so it’s not a likely ingredient in the recipes I come up with. However, if you’re in the mood for a flavorful, fun, and healthy variety of veggies in a tangy, punch-you-in-the-taste buds dressing, you won’t be disappointed. Here’s what I came up with.

Rainbow Fire Slaw
Serves 2-3
Ingredients:
2 cups cabbage (red or green), shredded
2 large carrots, julienned or sliced into thin shreds
1 yellow squash, julienned or sliced into thin shreds
1 zucchini squash, julienned or sliced into thin shreds
1 green apple (I used Granny Smith), julienned or sliced into thin shreds
3 green onions, thinly sliced
3 limes, juiced (about ¼ cup of lime juice)
2 garlic cloves, minced
2 tablespoons apple cider vinegar
½ teaspoon Sriracha hot chili sauce


Directions:
Combine all julienned or sliced veggies and the apple in a large, preferably stainless steel, bowl.
In a small bowl, whisk together lime juice, minced garlic, apple cider vinegar, and chili sauce. Stir well to combine.

Pour dressing over the slaw and stir well. Refrigerate for a minimum of 30 minutes to allow flavors to mingle.
Toss well prior to serving.

Note:
If you’re not a fan of spicy food, swap the Sriracha for sweet chili sauce. This would be good if you were planning on serving it to kids as well.
Results:
The hubs and I seriously loved this slaw. It’s tangy. It’s garlicky. It’s spicy. It’s just plain delicious. I piled a bunch on a plate and then topped it with a piece of grilled mahi-mahi and some mango salsa and it was TO DIE FOR. So many flavors dancing on my taste buds…it makes me happy just thinking about it right now.


Rainbow Fire Slaw would be great served with just about any fish or chicken dish. If you are feeling ambitious, you can make some spicy papaya salsa from scratch and top the meat/fish with that. This slaw would also be really tasty wrapped up in a tortilla fish-taco style.
My only regret was that I didn’t use red cabbage. I would have liked this slaw to be a little more “rainbow,” but I had to make do with green since it was all Trader Joes had in stock. The yellow squash and orange carrot do lend a little color to the mostly green palette, but if you can find red cabbage, please use that instead.

I hope you enjoy this recipe as much as we did. As always, I’d love to hear your feedback. Leave your thoughts in the comment section below or message me on Facebook.
Until next time,
Ryann

Monday, April 22, 2013

Veggie Quinoa Salad With Citrus-Basil Dressing

Full of protein--and delicious flavors!
I’m sure you’ve noticed but quinoa (pronounced keen-wah) is all the rage these days. This little protein-packed, gluten-free wonder is a big hit with health food nuts and regular Joes alike. Why? Because it’s so versatile. I’ve used it in everything from Pizza Bites to breakfast casseroles. Not only is it easy to make, it’s good for you too. And in my book, that’s a win-win.

I saw this recipe on Pinterest (of course!) and thought it sounded too yummy not to replicate. I put my own spin on it by omitting the corn, adding lime juice and pepper to the dressing, and using more basil than the original dish called for. I just love fresh basil. I couldn’t help myself.
Here’s what I came up with.

Veggie Quinoa Salad With Citrus-Basil Dressing
Serves 4
Ingredients:
1 cup quinoa, uncooked (I used the tri-color one from Trader Joes)
1 15-ounce can garbanzo beans, drained and rinsed
1 cup cherry or grape tomatoes, halved
1 cup bell pepper, chopped (I used orange)
1 cup green onion, sliced
2 tablespoons extra-virgin olive oil
1 lime, juiced
1 lemon, juiced
1 cup fresh basil
Freshly ground black pepper


Directions:
Cook quinoa according to package directions. Set aside to cool.
In a medium bowl, combine garbanzo beans, tomatoes, bell pepper, and green onion. Stir in quinoa once it has cooled to room temperature.

Place olive oil, lime and lemon juice, basil, and a dash of freshly ground black pepper in a food processor or blender and process until all the large basil leaves are chopped.
Pour dressing over veggies and quinoa and stir well to coat. Serve at room temperature or refrigerate for a minimum of 1 hour and serve cold.

Cooking Tip:
If you know you want to serve this salad cold, you can always make the quinoa ahead of time and refrigerate it until you are ready to use it.
Results:
As I’m sitting here typing up this blog post I seriously want to make this salad again. It’s so tangy, fresh, and delicious I can almost taste it now. (Can you tell I’m hungry?) This is one of my favorite dishes I’ve made recently. I love that it calls for fresh, healthy ingredients and that it only takes about 20 minutes to whip up (not including cooling time). I made this for lunch and ate the first round room temperature. It was great but I have to be honest, I preferred it cold for leftovers the next day. In fact, I liked it so much, I had it three days in a row. And that’s saying something because I get bored with food pretty quickly.


With all the protein from the quinoa and beans, this dish works as a standalone meal but it’s also a nice side for chicken, beef, fish…pretty much anything. Because quinoa is actually a seed, it’s gluten-free. You’ll note the absence of dairy and meat in this recipe so this salad is vegetarian and vegan, too.  And for those of you thinking, “This sounds too healthy to actually taste good.” I promise it is delicious.
So if you are in the mood for a little tangy, fresh, veggie-filled dish, give this one a try. You—and your taste buds—won’t be sorry.

Until next time,
Ryann

Monday, April 8, 2013

Crock Pot Verde Carnitas


Delicious and simple...what more can you ask for?
You know what I love? Easy recipes. And it doesn’t get any easier than tossing a few things in the Crock Pot. This is one of my tried-and-true slow cooker faves. I don’t know where the recipe originated from but I’ve changed it a little over time in order to make it as simple—and tasty—as possible.
In the past, I’ve always used Pacifico, Corona, or Tecate as my “cerveza” of choice, but I didn’t have any of those in the fridge so a nice maple porter from Sam Adams went into the pot instead. (Really, whichever beer you are willing to sacrifice will do the trick.) You can also swap the beer for water or chicken broth if you are so inclined. Finally, if you don’t like pork tenderloin, chicken works really well in this recipe, too. Here’s what I came up with.
Crock Pot Verde Carnitas
Serves 8-10
Ingredients:
1 medium white onion, chopped (a little reserved for garnish)

1 pork tenderloin (I get the 2-pack at Costco and use one package per meal…it’s probably 1.5 pounds or so)
1 12-ounce beer of your choice
1 large jar of salsa verde a.k.a. green salsa (a little reserved for garnish)
Fresh cilantro, washed, trimmed, and chopped (for garnish, optional)
Reduced-fat sour cream  (optional)
Corn or flour tortillas (I like the carb balance ones from Mission)
Guacamole (optional)
Directions:
Place chopped onion in slow cooker. Add tenderloin and pour beer into the pot. Cover the tenderloin with most of the jar of salsa verde (remember to save a little for later!). Cover and cook on low for 8-10 hours or on high for 4-6 hours.


When cooking time is complete, shred the tenderloin with a fork (when it’s done, it falls apart easily). Serve taco-style on corn or flour tortillas and garnish with remaining onion and salsa verde and add a little cilantro and sour cream, if desired. (Chopped tomatoes and shredded lite Mexican cheese are good additions too!)


Results:
Really, you can’t go wrong with these yummy carnitas. Be aware this recipe makes A LOT of food. It’s awesome for feeding a group but the leftovers are also great served over brown rice or on top of tortilla chips with cheese and jalapeños nacho style. If you are trying to be all healthy, you can serve this mixture over romaine lettuce and go the low-carb route. It’s really versatile and delicious no matter how you eat it.


The recipe as written above produces a fair amount of liquid. If you don’t like it so “soupy” you can reduce the amount of water or beer you add or leave it out altogether and just let the tenderloin cook in the salsa. Up to you!


Again, I‘ve been making this recipe for years and it’s always a big hit in our household. Give it a shot and let me know what you think.


Until next time,
Ryann


P.S. Happy 70th birthday, Dad! I love you and hope your day is as wonderful and special as you are.

Friday, March 22, 2013

Open Faced Turkey Bacon Egg Salad Sandwich


An Egg-cellent Alternative to the Boring Turkey Sandwich!
I don’t know about you, but I often get stuck in a rut, eating the same thing for lunch every day. I’ll admit I just don’t have a lot of energy, creativity, or patience by the time the mid-day meal rolls around. Usually there are two tired and hungry toddlers hanging off my leg demanding food, water, and everything else under the sun.  And by the time I get them fed, cleaned up, and planted in front of the tube for a little downtime I’m too beat to manage more than a sandwich.
Problem is, I’m SOOOO sick of deli turkey I might die. Okay, maybe not really but I’m seriously over lunchmeat right now. That’s why this recipe caught my eye. It’s easy to make, full of fresh, good-for-you ingredients, and best of all—it’s not a freaking turkey sandwich!
I really didn’t stray much from the original recipe. I just used grape tomatoes (because I had them in the fridge) and turkey bacon (because it’s less fatty). I also decided to make this an open-faced sandwich but you can cut the carbs by omitting the bread if you’re so inclined. Here’s what I came up with.
Open Faced Turkey Bacon Egg Salad Sandwich
Serves 2
Ingredients:
2 hard-boiled eggs, peeled and diced
1 avocado, diced
15-20 cherry or grape tomatoes
4 slices turkey bacon, cooked crispy and crumbled
1 tablespoon lemon juice
Pepper (to taste)
Salt (to taste)
2 slices sprouted grain bread, toasted
Directions:
Place eggs, avocado, tomatoes, cooked turkey bacon (I used the microwave!), and lemon juice in a small bowl and stir well to combine. Add a little salt and pepper to taste. Spoon egg salad mixture onto the slices of toasted sprouted grain bread and enjoy immediately.


Cooking Tip:
Hard-boiled eggs are awesome to have on hand for meals and snacks. They are so easy to make. Just place raw eggs in a single layer in the bottom of a medium saucepan. Fill the pan with enough cold water so that the eggs are covered with about an inch or so of water. Turn the burner on high and heat uncovered until water starts to boil. Remove from heat, cover, and let the eggs “cook” in the water for 12 minutes. After 12 minutes, you need to cool the eggs quickly. You can use a slotted spoon to remove the eggs from the pan and transfer them into cold (even iced) water or you can drain the water from the pot and add ice water to that. Whichever method is easiest for you. As soon as the eggs are cooled, they are ready to eat. You can also store unused eggs in an air-tight container for 3-5 days.


Results:
This recipe is SOOOOOOOO good! I’m not kidding…I ate some variation of this egg salad three days in a row after I first tested it. In fact, I’m going to boil some more eggs this afternoon so the hubs can try it for lunch this weekend. Yum!


If you’re sick and tired of turkey sandwiches (or whatever boring fallback lunch item you revert to), give this simple and tasty egg salad a shot. Do you have other easy lunchtime recipes you’d like to share? Send them to me at
ryanngroseclose@gmail.com or post them in the comments section below.

Until next time,
Ryann

Friday, March 8, 2013

Low-Sugar Banana Oatmeal Muffins


Low sugar, no flour, no oil, no butter = NO guilt!
I’ll be the first to admit that I’m no baker. I get baking powder and baking soda confused (which one freshens the fridge again?!) and I’ve never dared to attempt any recipe that calls for yeast for fear that whatever was supposed to rise wouldn’t.  But when I saw this yummy muffin recipe on Pinterest it piqued my interest. No flour, no oil, no butter…it sounded promising. Plus I already had all the ingredients in the cupboard so I was good to go.

I stuck to the original recipe pretty closely. But I wanted to cut back on the sugar—my children turn evil the second sugar hits their bloodstreams—so I used a little natural sweetener (stevia) instead. I also used quick oats (because I had them on hand).

The best part about these little low-sugar wonders is that you just toss everything in a food processor or blender, stick them in the oven for a bit, and in minutes you have a healthy, delicious, not-too-sweet treat. Here’s the modified recipe I came up with.
Low-Sugar Banana Oatmeal Muffins
Makes about 20 mini muffins or 10 regular muffins


Ingredients:

2 cups quick oats
1 cup plain low-fat Greek yogurt
2 eggs
¼ cup sugar
2 packets (2 grams) stevia powder (I used Stevia in the Raw)
¼ teaspoon vanilla extract
1½  teaspoons baking powder
½ teaspoon baking soda
2 ripe bananas

All the ingredients ready to go!

Directions:
Preheat oven to 400 degrees.


Place all ingredients in a blender or large food processor and blend until batter is smooth.
Line a muffin or mini muffin tin with paper or foil liners. Fill cups about ¾ of the way full.

Bake muffins at 400 degrees for 15-20 minutes or until a toothpick inserted in the middle of the muffin comes out clean.
Results:
My kids LOVED these. And my big kid (a.k.a. the hubs) and I really enjoyed them too. They had a great consistency—you’d never know I didn’t use flour—and even though they weren’t full of oil and sugar they tasted every bit as delicious as a traditional banana muffin.


I made mini muffins, which were perfect for snacking, lunches, etc., but regular sized ones would be great for breakfast on the go or brunch as well. Next time I make these, I’m going to try folding some fresh blueberries into the batter just prior to baking. I think they would make an awesome addition.
If you’ve been looking for low sugar, good-for-you muffins, you’ve come to the right place. Give this recipe a try and, as always, let me know what you think.

Until next time,
Ryann

Friday, February 22, 2013

Cilantro-Lime Chickpea Salad

Fresh, tangy, and oh-so-tasty!
I don’t know what it is about cilantro but I’ve been obsessed with it lately. Its pungent, savory flavor is amazing—especially when combined with citrus—and I keep finding excuses to make recipes that call for this tasty herb.

Not everyone feels the same way. In fact, it’s quite a polarizing issue. People either love or hate cilantro...there doesn’t seem to be much in-between. My dad told me that cilantro actually tastes different to some people. Since he’s a rocket scientist (I’m not joking) I’ll defer to him on this one.
Anyhoo, when I ran across this salad that called for another of my favorites (chickpeas) along with fresh veggies all tossed in a yummy cilantro-lime vinaigrette, I knew I had to tweak it to make it my own.

I left out the corn and salt, decreased the amount of olive oil, added a little apple cider vinegar, and changed the portion of veggies a bit. Here’s what I came up with.


Cilantro-Lime Chickpea Salad

Serves 4
Ingredients:
I (15-ounce) can chickpeas (garbanzo beans), drained and rinsed
1 medium cucumber, peeled and diced
1 cup cherry or grape tomatoes, halved
1 cup green bell pepper, diced
½ cup red onion, finely diced
1 tablespoon extra-virgin olive oil
2 tablespoons apple cider vinegar
2 limes, juiced (about 1 tablespoon lime juice)
2 garlic cloves
½-1 cup cilantro (I used 1 full cup)


Directions:

In a medium bowl combine chickpeas, cucumber, tomatoes, bell pepper, and red onion.


Place olive oil, vinegar, lime juice, garlic, and cilantro in a blender or food processor and pulse until smooth.


Pour cilantro-lime vinaigrette over chickpea/vegetable mixture and stir well to combine. Place in the refrigerator and chill for a minimum of 30 minutes. Stir well just prior to serving.


Results:
I was surprised at how tangy—almost spicy—this salad turned out. The combo of red onion, bell pepper, and garlic gave it quite the punch. The acidity of the lime juice and apple cider vinegar kicked it up a notch as well.


The hubs said he enjoyed it but would have liked a little feta cheese. I’m sure that cheese would be a delightful addition (and I’ll probably try it at some point) but I kind of like the way this vegan/healthy dish turned out. It’s one of those things that not only tastes great but is good for you too.


I was eating leftovers for lunch the day after I made this and my 16-month-old son surprised the heck out of me by eating the cucumbers covered in the spicy cilantro-lime vinaigrette. Granted he is the adventurous eater (my three-year-old daughter is MUCH pickier) but I was I was thrilled that he seemed to like this salad as much as his mommy.  


The only thing I might do differently next time is to use an orange or yellow bell pepper instead of a green one. And the only reason would be to add another pop of color. Our foods should be as colorful and diverse as we can make them—it helps ensure we ingest a wider range of nutrients, vitamins, and minerals.
Bottom line: If you love cilantro even half as much as I do, give this tasty salad a try.
Until next time,
Ryann